
Friday, August 31, 2018
Adventures in Woodworking: Sometimes Failure is not only an option. It’s a necessity
 |
| This cool picture was the only nice thing to come out of my shop on one very frustrating night. |
Sometimes though, as I found out recently, the effort to fix that mistake (or small series of them) just is not worth the time and effort. You’re better off throwing in the towel, admitting to yourself you screwed up, and starting all over again.
Over the last month and a half, I’ve been working on the bottom, center cabinet in the bookcase/media center I wrote about back in May. Its main feature is supposed to be a pull-out rack for my stereo and A/V equipment that can swivel 90 degrees to the right and left to allow easy access to the wiring at back.
There are commercial versions of this, but they cost between $550 and $800, which seems to me like an outrageous sum considering my six-piece, component stereo system cost that much back in 1987! It’s not like the designs of these racks are all that complicated. It’s just a small shelving unit that slides out on rails and can turn around. It seemed to me I could accomplish the same thing with a pair of full extension drawer slides and lazy Susan turntables.
I briefly considered using a small computer server rack with bolt-on shelves as they are strong and light. But after a quick Google search, I found none were exactly the dimensions I needed and the few that were close were almost as expensive as the slide-out AV rack I was trying to recreate.
So then it was off to the big-box store to look at perforated angle-iron, like the kind that is used in utility or garage shelving. The individual pieces they had in stock were too light-duty for my needs and the more heavy-duty versions I was after only came as part of those shelving units. I suppose I could have gotten one of them and cut the few parts I needed from those kits, but that would have been expensive not to mention wasteful, defeating the idea of building this on the cheap…
That left me with only one option: Make it out of wood.
 |
| The design for the pull-out A/V rack. Seems simple, right? |
It seemed simple enough and I AM a woodworker. How hard could it be?
I should know by now that the answer to that question is always “much harder than you think!”
Even though I had spent a few hours “building” it in SketchUp, cutting every piece and all the joinery in the program as if I were in the shop, I still encountered problems building it in the real world.
I keep forgetting that there is a big difference between handling material in the virtual world and how you handle it when you’re trying to safely push it through a spinning blade. Mostly that problem came down to the fact that some of the pieces were just too big for the capacity of my table saw.
As I endeavor to leave the shop with the same number of fingers and limbs I entered it with, I often rehearse cuts before I make them with the power off and blade down. This way I can see if there are going to be any problems and plan how to avoid them. This was especially important this time around, as Mrs. BlueScream wasn’t around to rush me to the hospital in the event something did go wrong.
After a few rehearsals, I very quickly realized that there was NO safe way to make the cuts I had planned to do on table saw. This forced me to improvise and instead of taking time to think things through in my usual meticulous manner, I just winged it, because I didn’t want to add another delay to this project.
That turned out to be a big a mistake.
Because the solution I came up with – while safe and almost as fast as using the table saw – turned out sloppily cut joints and slightly out of square parts. In the hands of other woodworkers, a jig jaw and circular saw can be super accurate. But I only use mine to cut the rare curved part I can’t do on my bandsaw or for breaking down plywood into more manageable sizes.
I deluded myself into thinking I could fix those errors in the glue-up stage and with some trimming here and there when it was dry, so I pushed on and painted and finished the unit. I was all proud of myself that it came together pretty well and most people wouldn’t be able to tell or see where I messed up. It even fit in the cabinet.
Well almost.
 |
FAIL! Not only is this way too tight, it's also out of square!
|
The depth issue didn’t seem to be a big one. I’d purposely made it a bit deeper than I thought I needed, because I knew I could fix that issue safely with two quick rip cuts on my table saw.
The binding/out-of-square problem wasn’t as easy to fix.
I spent a sleepless night tossing and turning trying to figure out a way to fix it. Unlike the depth issue, there was just no way to correct this using my table saw. So I broke out my hand tools and got to work.
I spent an entire hot and humid evening in my garage trimming, plaining and sanding only making a tiny bit of progress. At 11:30 p.m. I literally threw in the towel I’d been using to wipe away my sweat and admitted defeat. It would take at least another whole weekend to try and fix it this way and the results would NOT have looked good. In the same time or less I could just get another sheet of plywood and start all over again.
So that’s what I did and the pictures you see here are mostly from that build.
At first I was discouraged by my failure and having to throw out a month’s worth of work. I began doubting my skills as a woodworker. After all, the Youtube makers I watch on a regular basis always make their projects look so easy.
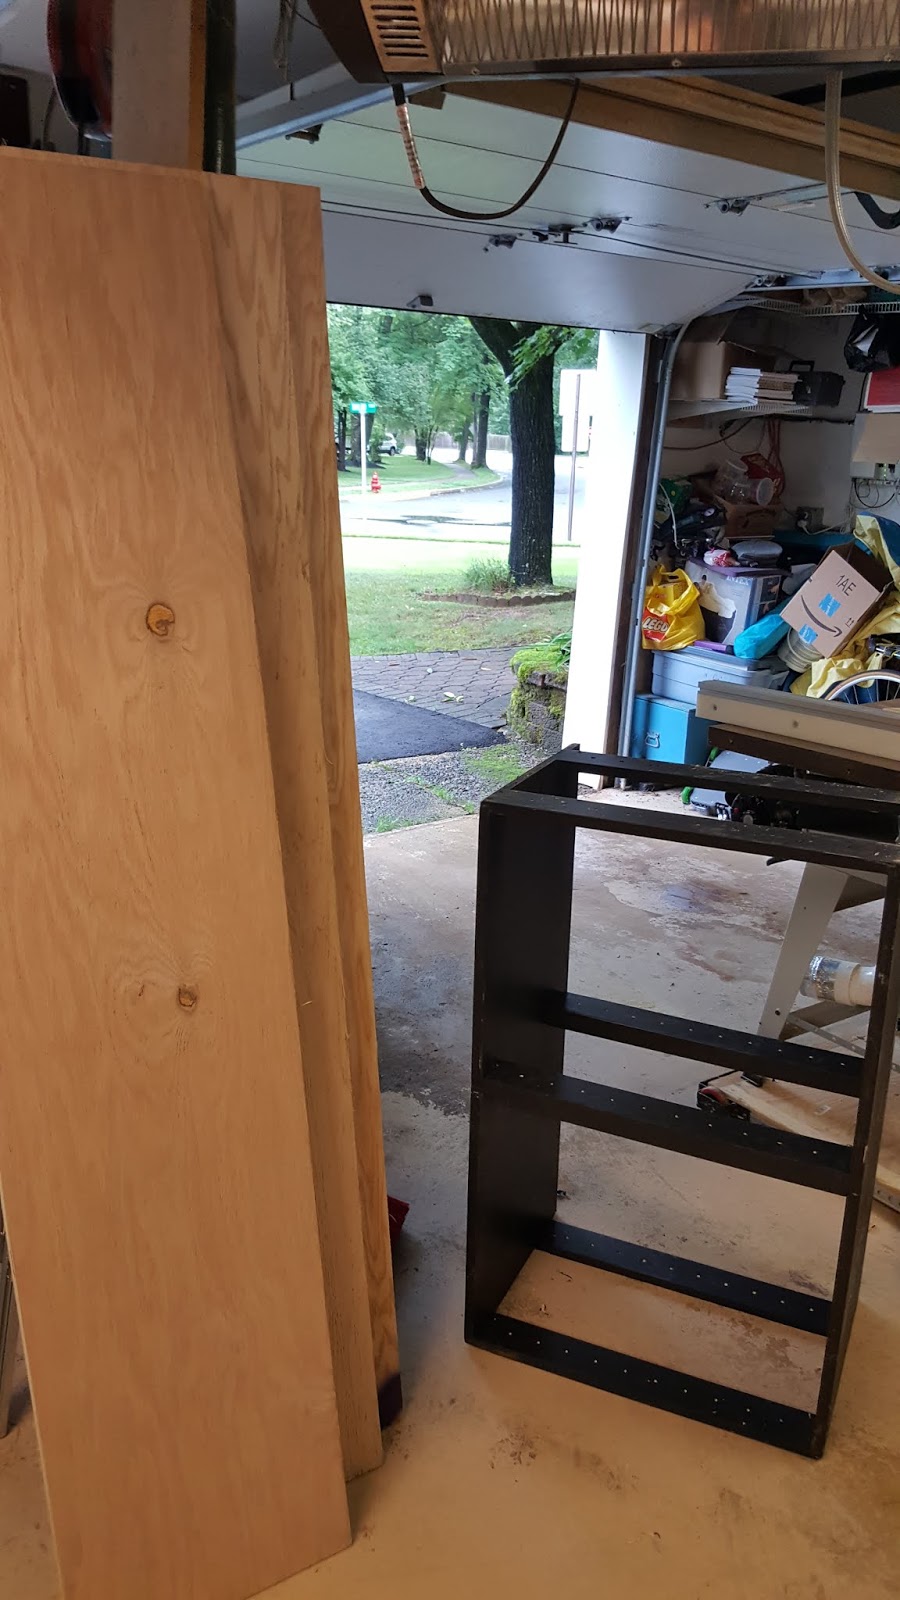 |
| New plywood stands next to my failed first attempt at the rack. |
My solution for the joinery?
No power tools.
Granted, it did that did take over twice as long to make them that way. But they came out much more accurate because the slower pace at which they cut meant I had more time to check and correct any error before it got too big. I also felt I had better control over the tools because I wasn’t constantly worried about accidentally cutting my fingers off before I could realize they were in the way of the tool.
Interestingly, I also discovered I enjoyed using those “old fashioned” methods. Using handsaws, a chisel and a hammer, made me feel more connected to my craft and more like “a real woodworker” in a way that my power tools seldom do.
So was this really a failure then?
I learned some new techniques and now have a better understanding and comfort level with some of my more rarely used power tools. I also now have a better idea of when and where those tools work best for me.
Taking that into consideration, I’d say no, it really wasn’t.
It wasn’t a win either, as I did waste some expensive material. But I guess that is the price you pay to get better at your craft.
 |
| The new pieces of the rack have been cut out and sit on the old rack. The holes for the adjustable shelves have also been drilled into the side and middle rails. |
 |
| Here I'm making the side notches that the side rails fit into using just a back saw, hammer and chisel. Originally I was intending to make these cuts by standing these panels up on my table saw and running them through a dado blade. |
 |
| The notches in the center of the top and bottom panel were made in a similar manner. Except instead of a saw, I used to drill to hog out the waste then the hammer and chisel to square everything up. |
 |
| Its really true that a woodworker can never have too many clamps, especially large ones! I needed almost every long clamp I had to hold the rack together while the glue dried. I also used those black angle brackets everywhere to ensure it came together dead on square this time! |
 |
Here's the new rack in the cabinet. It fits with room to spare and no longer rubs or binds when it slides out. All it needs now is a coat or two of black paint. (The cabinet is sitting upside-down on my bench with the base now sticking up in the air).
|
 |
| And finally this is the rack extending out of the case on its rails. In this position, I'll be able to turn it to the right or left to access the wires on the back of the equipment which will sit on those adjustable shelves. |
Subscribe to:
Comments (Atom)